 ](https://argon-dashboard-pro-laravel.creative-tim.com)
## Free demo
Check out the open-source demo version for a taste of what Argon Dashboard PRO Laravel has to offer https://www.creative-tim.com/product/argon-dashboard-laravel
## Table of Contents
* [Prerequisites](#prerequisites)
* [Installation](#installation)
* [Usage](#usage)
* [Versions](#versions)
* [Demo](#demo)
* [Documentation](#documentation)
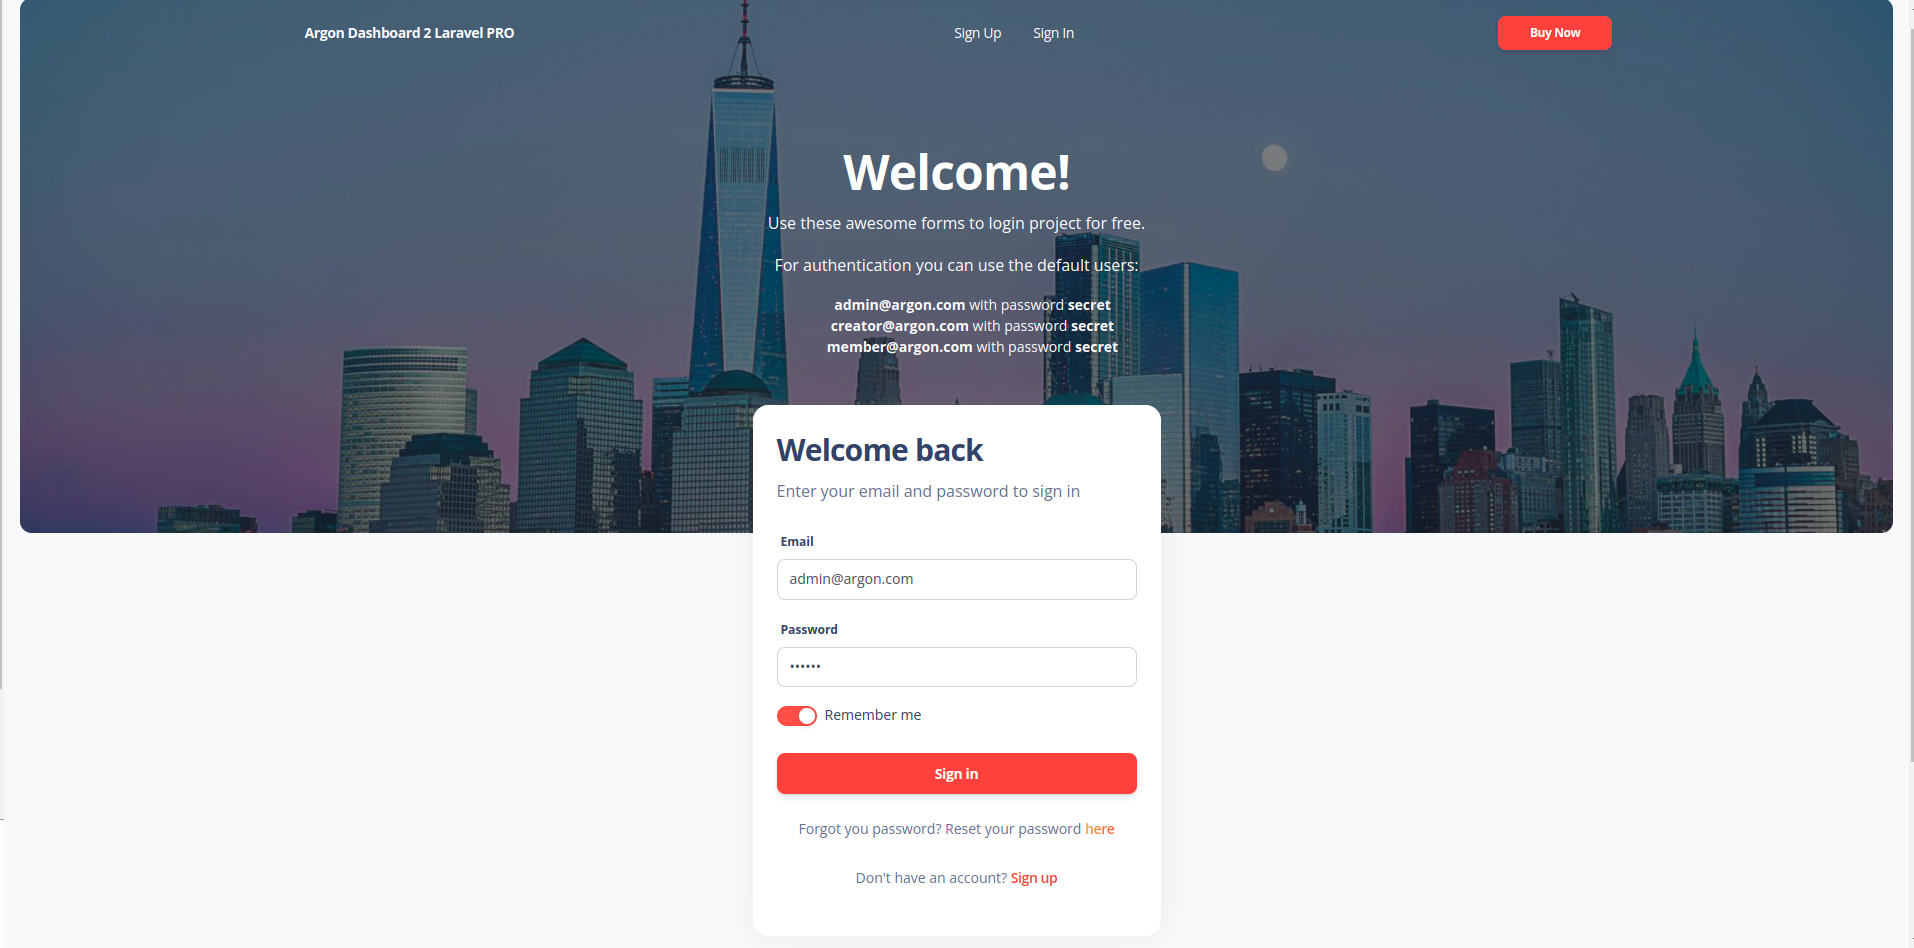
* [Login](#login)
* [Register](#register)
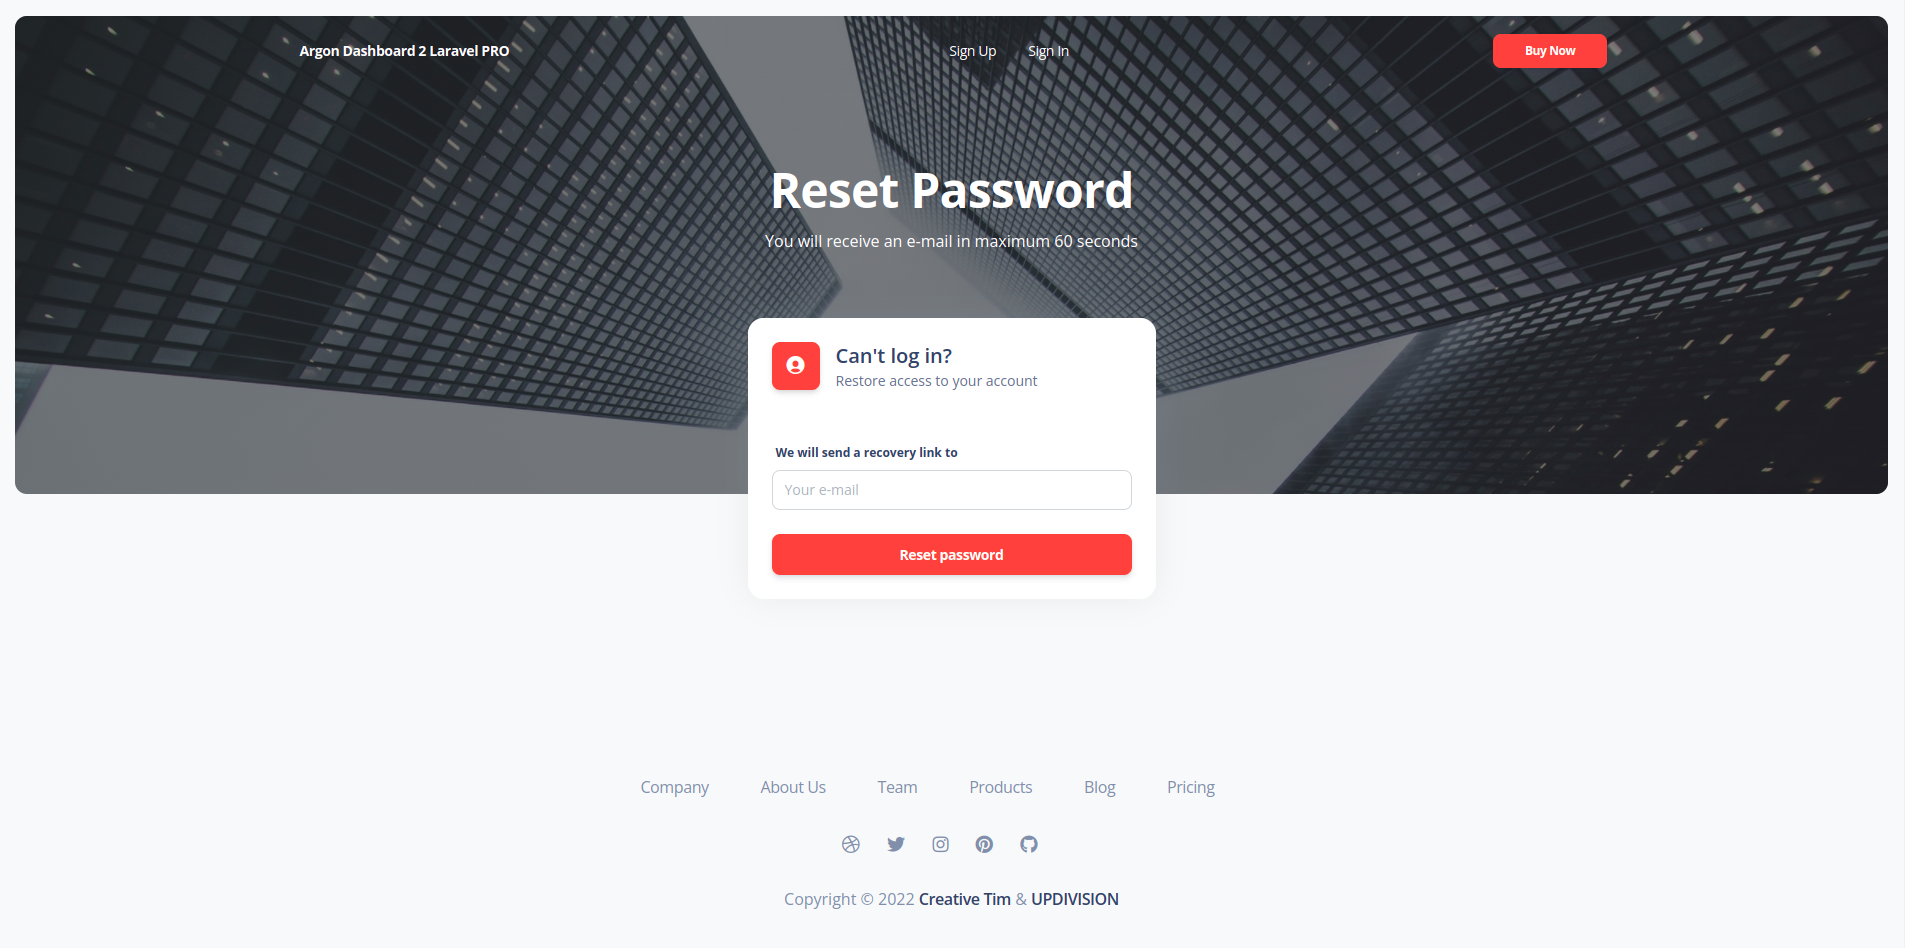
* [Forgot Password](#forgot-password)
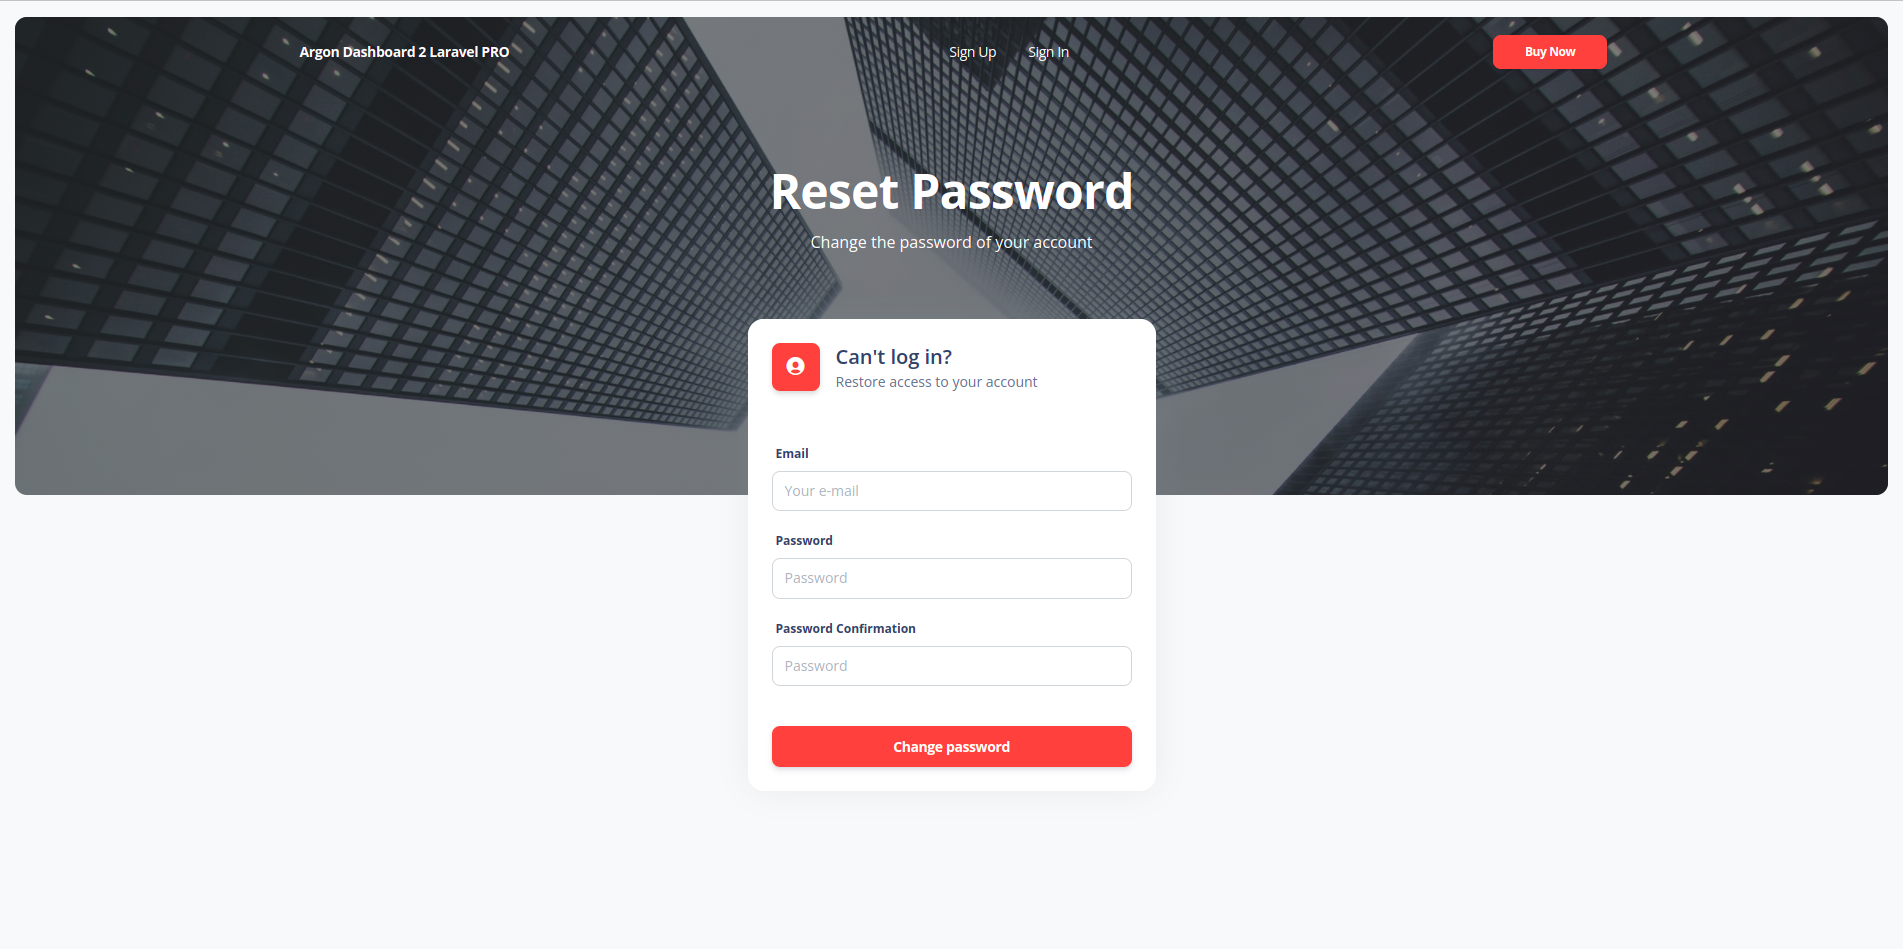
* [Reset Password](#reset-password)
* [User Profile](#my-profile)
* [User Management](#users-management)
* [Role Management](#role-management)
* [Category Management](#category-management)
* [Tag Management](#tag-management)
* [Item Management](#item-management)
* [File Structure](#file-structure)
* [Browser Support](#browser-support)
* [Reporting Issues](#reporting-issues)
* [Licensing](#licensing)
* [Useful Links](#useful-links)
* [Social Media](#social-media)
* [Credits](#credits)
## Prerequisites
If you don't already have an Apache local environment with PHP and MySQL, use one of the following links:
- Windows: https://updivision.com/blog/post/beginner-s-guide-to-setting-up-your-local-development-environment-on-windows
- Linux: https://howtoubuntu.org/how-to-install-lamp-on-ubuntu
- Mac: https://wpshout.com/quick-guides/how-to-install-mamp-on-your-mac/
Also, you will need to install Composer: https://getcomposer.org/doc/00-intro.md
And Laravel: https://laravel.com/docs/9.x/installation
## Installation
1. Unzip the downloaded archive
2. Copy and paste **argon-dashboard-pro-laravel-master** folder in your **projects** folder. Rename the folder to your project's name
3. In your terminal run `composer install`
4. Copy `.env.example` to `.env` and updated the configurations (mainly the database configuration: database name, user name and password, set the APP_URL to the right path)
5. In your terminal run `php artisan key:generate`
6. Run `php artisan migrate --seed` to create the database tables and seed the roles and users tables
7. Run `php artisan storage:link` to create the storage symlink (if you are using **Vagrant** with **Homestead** for development, remember to ssh into your virtual machine and run the command from there).
## Usage
Register a user or login with the default users with different roles from your database and start testing (make sure to run the migrations and seeders for these credentials to be available):
* **admin@argon.com** and password **secret**
* **creator@argon.com** and password **secret**
* **member@argon.com** and password **secret**
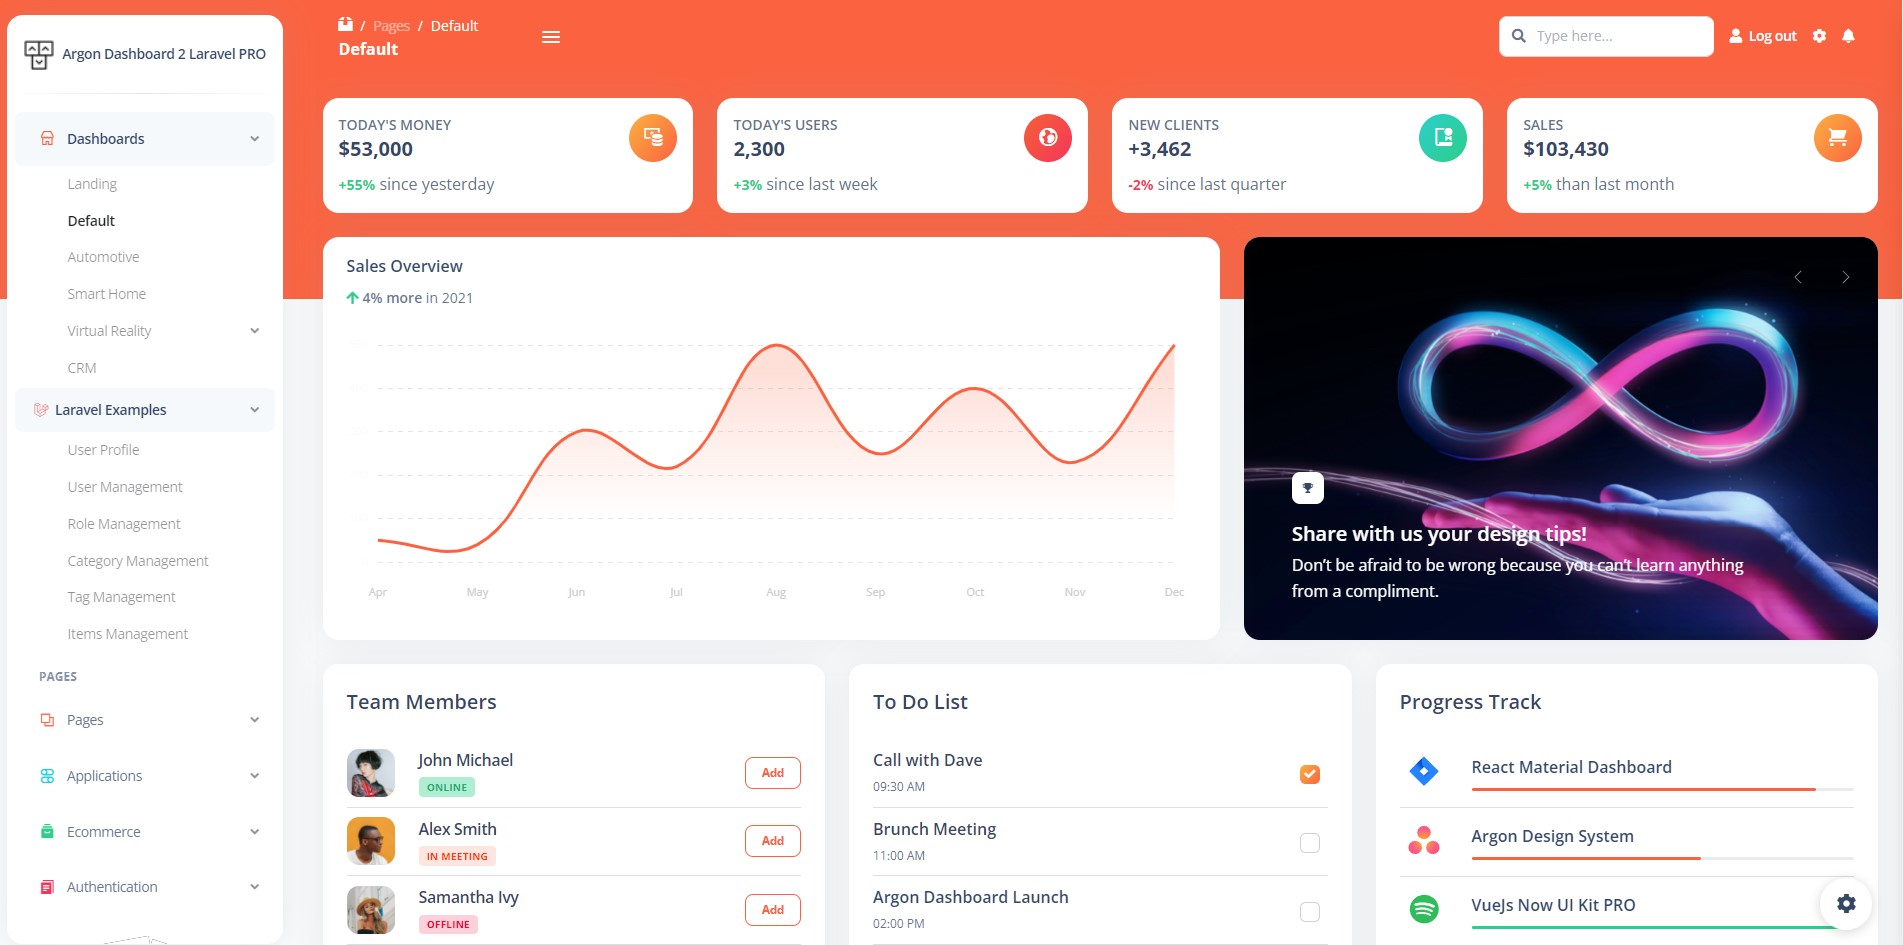
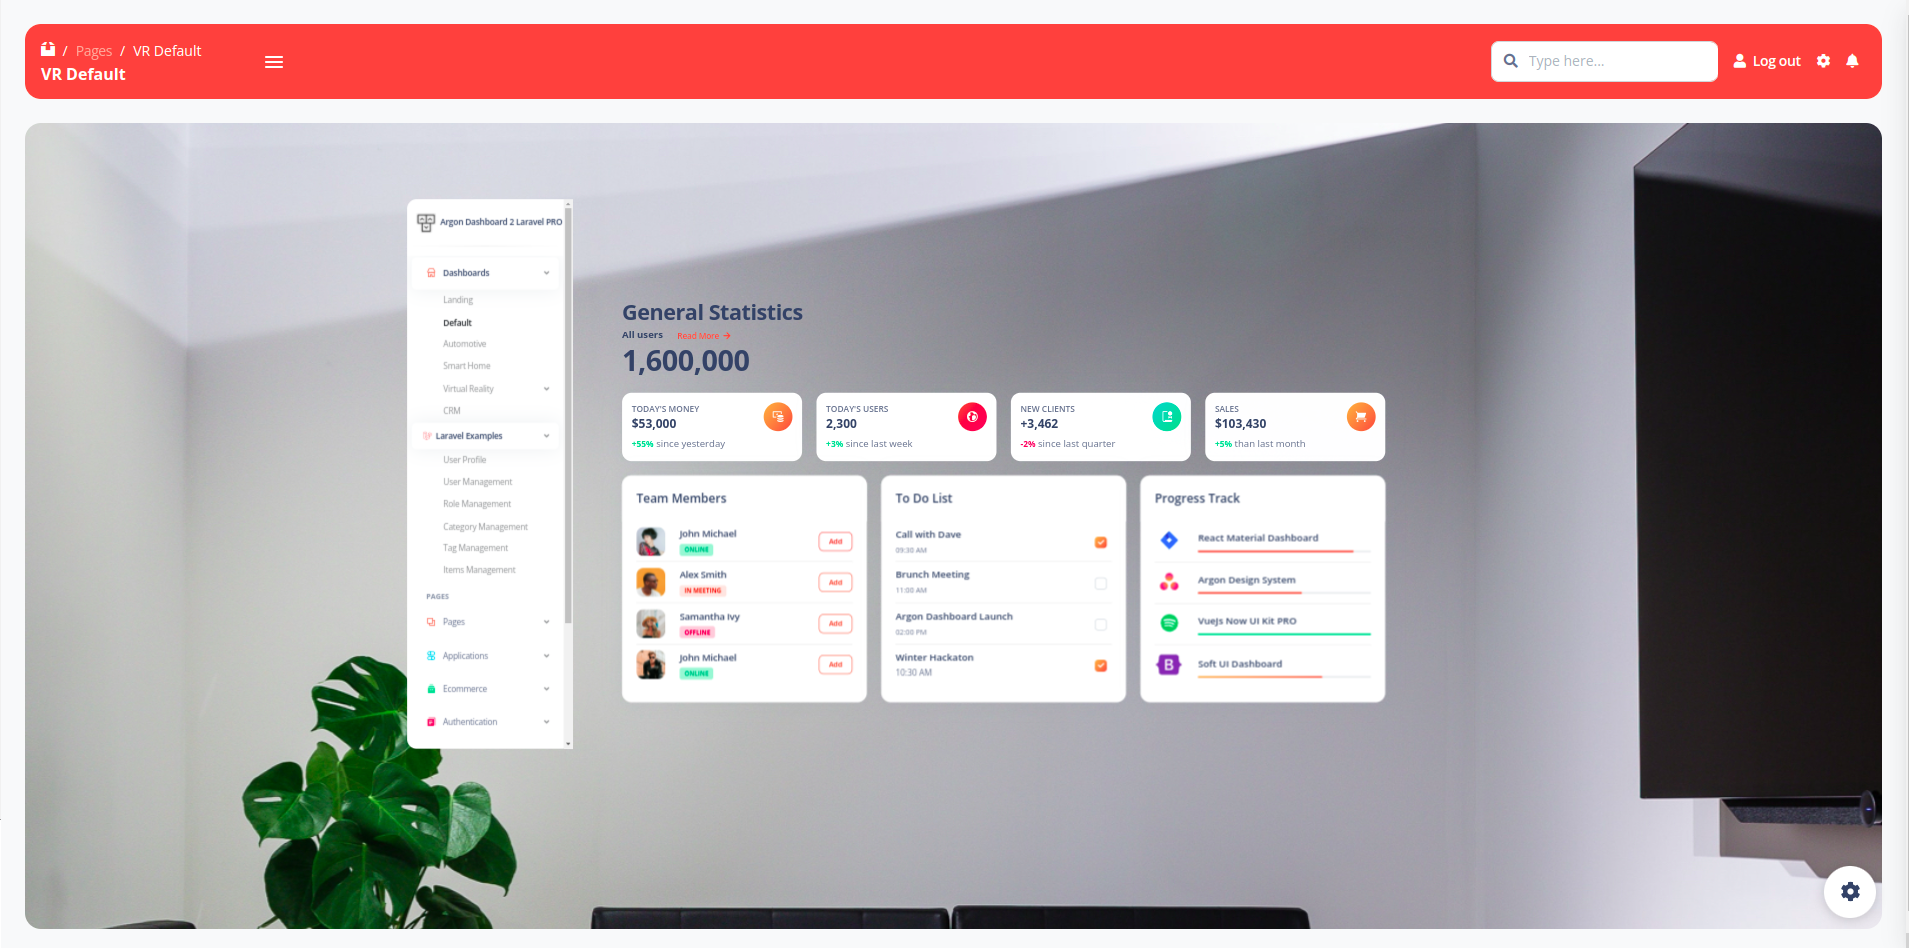
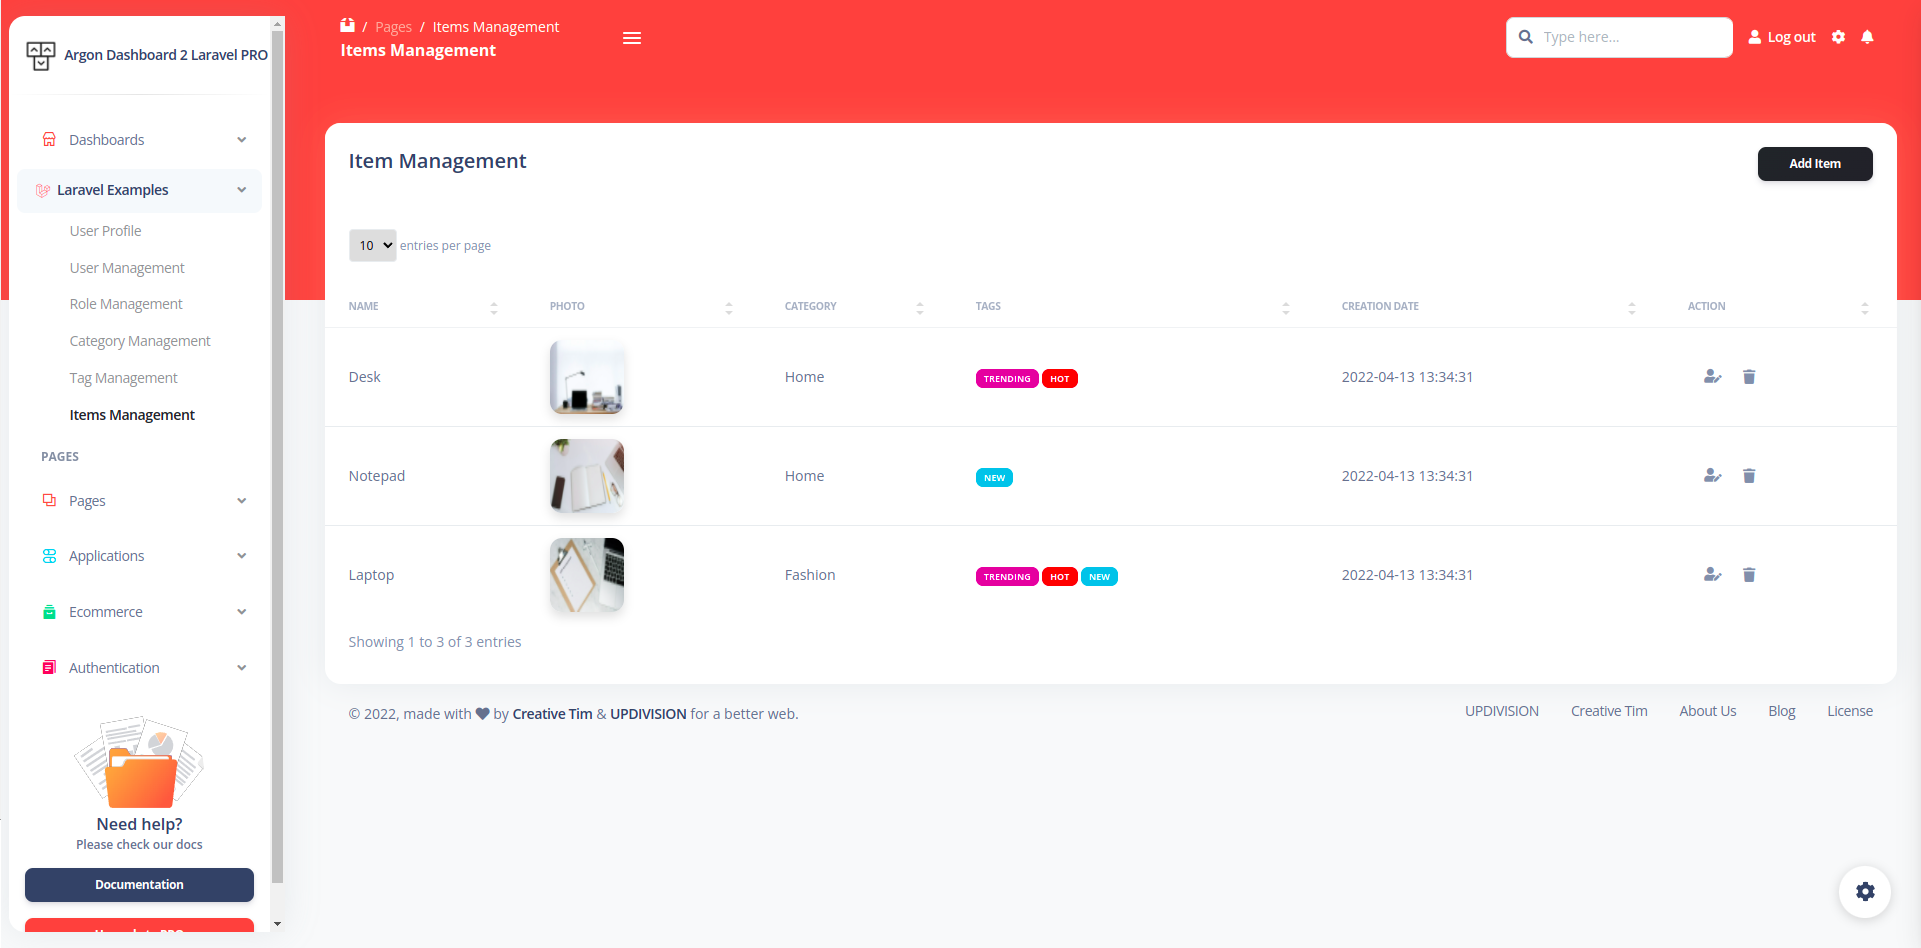
Besides the numerous types of dashboard, you can find pages for editing your profile, pages for managing the users, the roles, the items, the categories and the tags. There are also static pages for profile, for users, for projects, for accounts, for various applications, for ecommerce and different styles of pages for authentication. All the necessary files are installed out of the box and all the needed routes are added to `routes/web.php`. Keep in mind that all of the features can be viewed once you login using the credentials provided or by registering your own user.
## Versions
[
](https://argon-dashboard-pro-laravel.creative-tim.com)
## Free demo
Check out the open-source demo version for a taste of what Argon Dashboard PRO Laravel has to offer https://www.creative-tim.com/product/argon-dashboard-laravel
## Table of Contents
* [Prerequisites](#prerequisites)
* [Installation](#installation)
* [Usage](#usage)
* [Versions](#versions)
* [Demo](#demo)
* [Documentation](#documentation)
* [Login](#login)
* [Register](#register)
* [Forgot Password](#forgot-password)
* [Reset Password](#reset-password)
* [User Profile](#my-profile)
* [User Management](#users-management)
* [Role Management](#role-management)
* [Category Management](#category-management)
* [Tag Management](#tag-management)
* [Item Management](#item-management)
* [File Structure](#file-structure)
* [Browser Support](#browser-support)
* [Reporting Issues](#reporting-issues)
* [Licensing](#licensing)
* [Useful Links](#useful-links)
* [Social Media](#social-media)
* [Credits](#credits)
## Prerequisites
If you don't already have an Apache local environment with PHP and MySQL, use one of the following links:
- Windows: https://updivision.com/blog/post/beginner-s-guide-to-setting-up-your-local-development-environment-on-windows
- Linux: https://howtoubuntu.org/how-to-install-lamp-on-ubuntu
- Mac: https://wpshout.com/quick-guides/how-to-install-mamp-on-your-mac/
Also, you will need to install Composer: https://getcomposer.org/doc/00-intro.md
And Laravel: https://laravel.com/docs/9.x/installation
## Installation
1. Unzip the downloaded archive
2. Copy and paste **argon-dashboard-pro-laravel-master** folder in your **projects** folder. Rename the folder to your project's name
3. In your terminal run `composer install`
4. Copy `.env.example` to `.env` and updated the configurations (mainly the database configuration: database name, user name and password, set the APP_URL to the right path)
5. In your terminal run `php artisan key:generate`
6. Run `php artisan migrate --seed` to create the database tables and seed the roles and users tables
7. Run `php artisan storage:link` to create the storage symlink (if you are using **Vagrant** with **Homestead** for development, remember to ssh into your virtual machine and run the command from there).
## Usage
Register a user or login with the default users with different roles from your database and start testing (make sure to run the migrations and seeders for these credentials to be available):
* **admin@argon.com** and password **secret**
* **creator@argon.com** and password **secret**
* **member@argon.com** and password **secret**
Besides the numerous types of dashboard, you can find pages for editing your profile, pages for managing the users, the roles, the items, the categories and the tags. There are also static pages for profile, for users, for projects, for accounts, for various applications, for ecommerce and different styles of pages for authentication. All the necessary files are installed out of the box and all the needed routes are added to `routes/web.php`. Keep in mind that all of the features can be viewed once you login using the credentials provided or by registering your own user.
## Versions
[ ](https://www.creative-tim.com/product/argon-dashboard)
[
](https://www.creative-tim.com/product/argon-dashboard)
[ ](https://www.creative-tim.com/product/argon-dashboard-react)
[
](https://www.creative-tim.com/product/argon-dashboard-react)
[ ](https://www.creative-tim.com/product/vue-argon-dashboard)
[
](https://www.creative-tim.com/product/vue-argon-dashboard)
[ ](https://www.creative-tim.com/product/argon-dashboard-angular)
[
](https://www.creative-tim.com/product/argon-dashboard-angular)
[ ](https://www.creative-tim.com/product/argon-dashboard-asp-net)
[
](https://www.creative-tim.com/product/argon-dashboard-asp-net)
[ ](https://www.creative-tim.com/product/argon-dashboard-nodejs)
[
](https://www.creative-tim.com/product/argon-dashboard-nodejs)
[ ](https://www.creative-tim.com/product/argon-dashboard-laravel)
| HTML | Vue | Laravel |
| --- | --- | --- |
| [](https://www.creative-tim.com/product/argon-dashboard-pro) | [](https://www.creative-tim.com/product/vue-argon-dashboard-pro) | [](https://www.creative-tim.com/product/argon-dashboard-pro-laravel) |
## Demo
| Register | Login |
| --- | --- |
| [
](https://www.creative-tim.com/product/argon-dashboard-laravel)
| HTML | Vue | Laravel |
| --- | --- | --- |
| [](https://www.creative-tim.com/product/argon-dashboard-pro) | [](https://www.creative-tim.com/product/vue-argon-dashboard-pro) | [](https://www.creative-tim.com/product/argon-dashboard-pro-laravel) |
## Demo
| Register | Login |
| --- | --- |
| [ ](https://argon-dashboard-pro-laravel.creative-tim.com/register) | [
 ](https://argon-dashboard-pro-laravel.creative-tim.com/login)
| Forgot Password Page | Reset Password Page |
| --- | --- |
| [
](https://argon-dashboard-pro-laravel.creative-tim.com/login)
| Forgot Password Page | Reset Password Page |
| --- | --- |
| [ ](https://argon-dashboard-pro-laravel.creative-tim.com/reset-password) | [
 ](https://argon-dashboard-pro-laravel.creative-tim.com/change-password)
| Dashboard | Virtual Reality |
| --- | --- |
| [
](https://argon-dashboard-pro-laravel.creative-tim.com/change-password)
| Dashboard | Virtual Reality |
| --- | --- |
| [ ](https://argon-dashboard-pro-laravel.creative-tim.com/dashboard) | [
 ](https://argon-dashboard-pro-laravel.creative-tim.com/vr-default)
| Profile Page | User Management |
| --- | --- |
| [
](https://argon-dashboard-pro-laravel.creative-tim.com/vr-default)
| Profile Page | User Management |
| --- | --- |
| [ ](https://argon-dashboard-pro-laravel.creative-tim.com/user-profile) | [
 ](https://argon-dashboard-pro-laravel.creative-tim.com/users-management)
| Role Management | Item Management |
| --- | --- |
| [
](https://argon-dashboard-pro-laravel.creative-tim.com/users-management)
| Role Management | Item Management |
| --- | --- |
| [ ](https://argon-dashboard-pro-laravel.creative-tim.com/role-management)| [
 ](https://argon-dashboard-pro-laravel.creative-tim.com/item-management)
| Category Management | Tag Management |
| --- | --- |
| [
](https://argon-dashboard-pro-laravel.creative-tim.com/item-management)
| Category Management | Tag Management |
| --- | --- |
| [ ](https://argon-dashboard-pro-laravel.creative-tim.com/category-management) | [
 ](https://argon-dashboard-pro-laravel.creative-tim.com/tag-management)
[View More](https://www.creative-tim.com/live/argon-dashboard-pro-laravel)
## Documentation
The documentation for the Material Dashboard Laravel is hosted at our [website](https://www.creative-tim.com/live/argon-dashboard-pro-laravel/docs/bootstrap/overview/argon-dashboard/index.html).
### Login
If you are not logged in you can only access this page or the Sign Up page. The default url takes you to the login page where you use the default credentials **admin@argon.com** with the password **secret** but you can change them with the credentials for creator and for member. Logging in is possible only with already existing credentials. For this to work you should have run the migrations. The user also has the option to choose if he wants to be remembered or not.
The `App/Http/Controllers/App/LoginController.php` handles the logging in of an existing user.
```
public function login(Request $request)
{
$credentials = $request->validate([
'email' => ['required', 'email'],
'password' => ['required'],
]);
if (Auth::attempt(['email' => $request->email, 'password' => $request->password])) {
$request->session()->regenerate();
return redirect()->intended('/');
}
return back()->withErrors([
'email' => 'The provided credentials do not match our records.',
]);
}
```
### Register
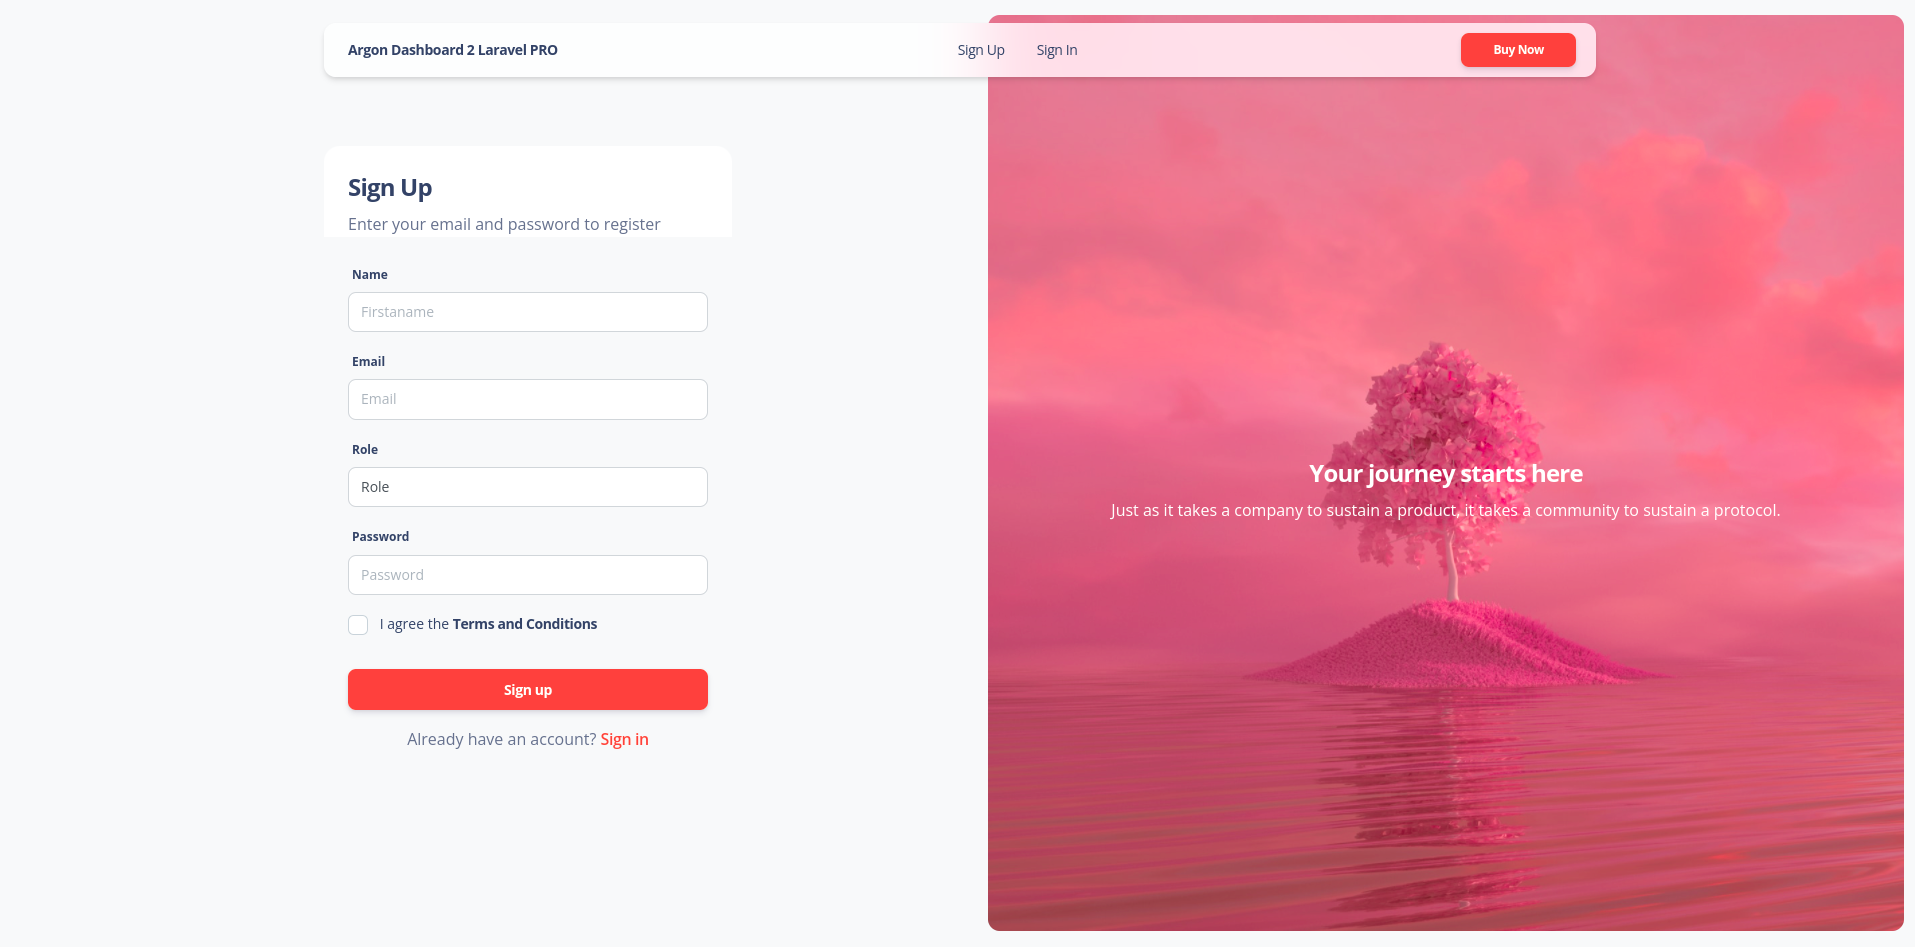
You can register as a user by filling in the name, email, role and password for your account. For your role you can choose between the Admin, Creator and Member. It is important to know that an admin user has access to all the pages and actions, can delete, add and edit another users, other roles, items, tags or categories; a creator user has acces to category, tag and item management, but can not add, edit or delete other users; a member user has access to the item management but can not take any actions. You can do this by accessing the sign up page from the "**Sign Up**" button in the top navbar or by clicking the "**Sign Up**" button from the bottom of the log in form. Another simple way is adding **/register** in the url.
The `App/Http/Controllers/Auth/RegisterController.php` handles the registration of a new user.
```
$user = User::create([
'firstname' => $attributes['firstname'],
'email' => $attributes['email'],
'role_id' => $attributes['role'],
'password' => $attributes['password']
]);
auth()->login($user);
```
### Forgot Password
If a user forgets the account's password it is possible to reset the password. For this the user should click on the "**here**" under the login form.
The `App/Http/Controllers/Auth/ResetPassword.php` takes care of sending an email to the user where he can reset the password afterwards.
```
public function send(Request $request)
{
$email = $request->validate([
'email' => ['required']
]);
$user = User::where('email', $email)->first();
if ($user) {
$this->notify(new RecoverPassword($user->id));
return back()->with('succes', 'An email was send to your email address');
}
}
```
### Reset Password
The user who forgot the password gets an email on the account's email address. The user can access the reset password page by clicking the button found in the email. The link for resetting the password is available for 12 hours. The user must add the new password and confirm the password for his password to be updated. The user is redirected to the login page.
The `App/Http/Controllers/Auth/ChangePassword.php` helps the user reset the password.
```
if ($existingUser) {
$existingUser->update([
'password' => $attributes['password']
]);
return redirect('login');
} else {
return back()->with('error', 'Your email does not match the email who requested the password change');
}
```
### User Profile
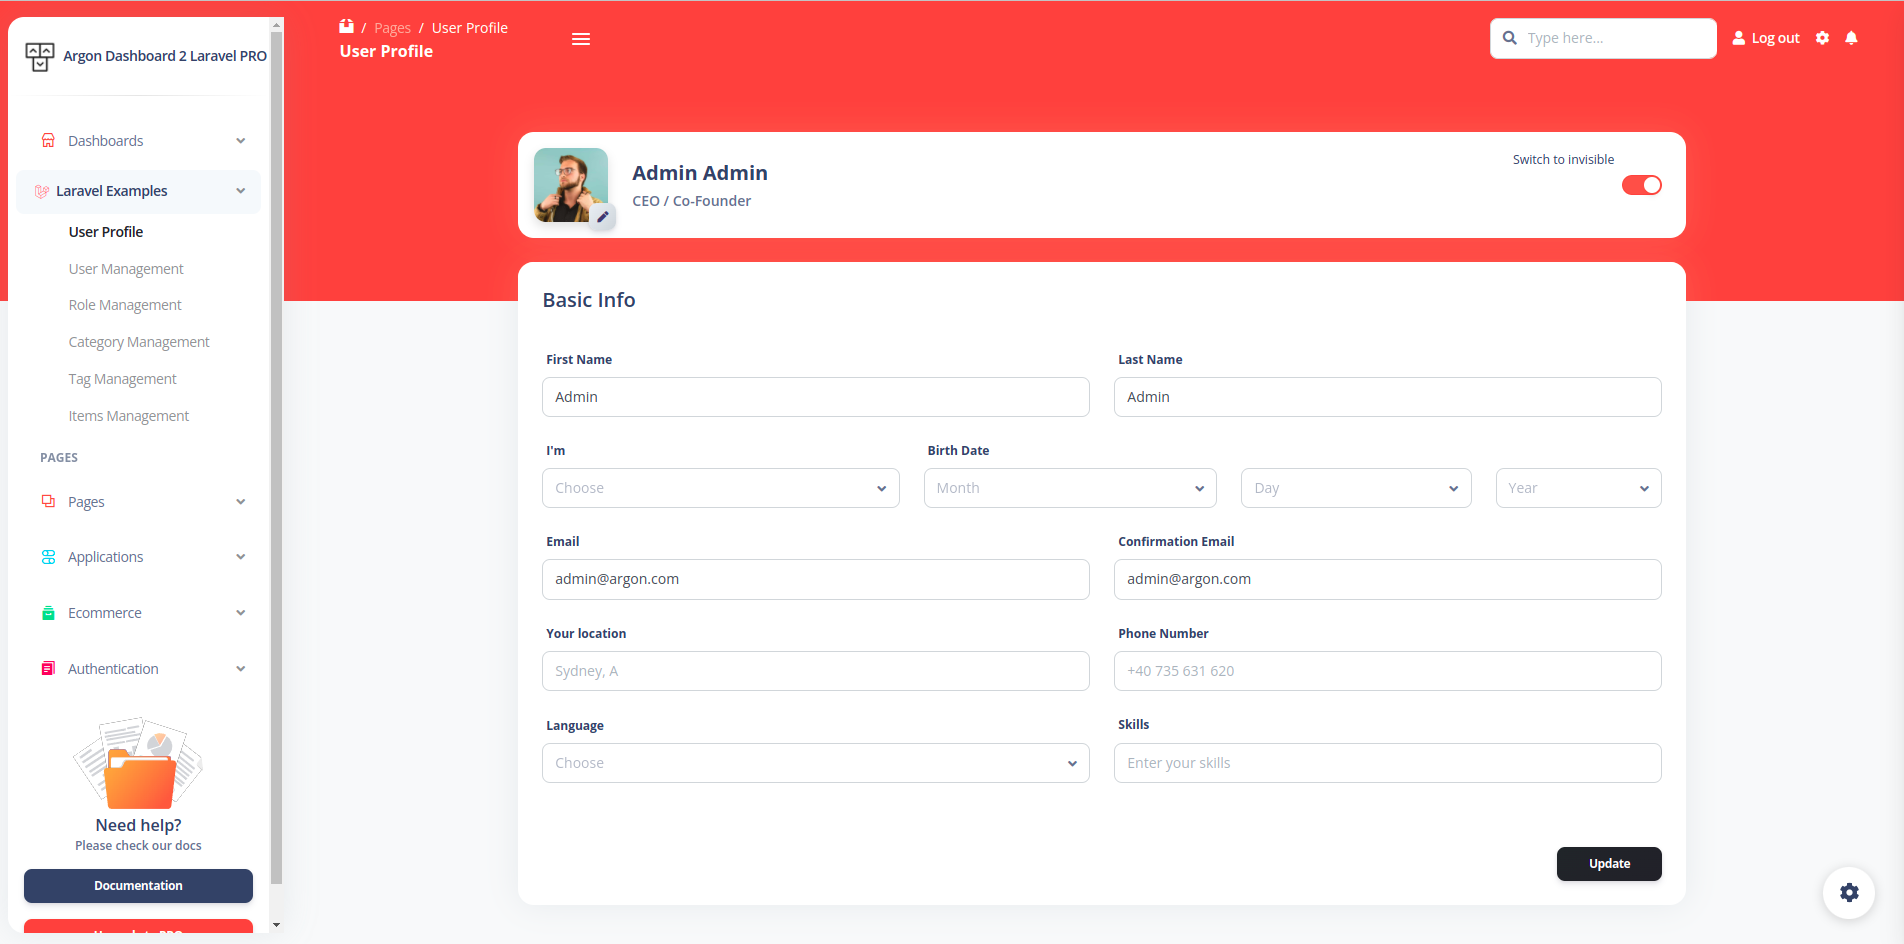
The profile can be accessed by a logged in user by clicking "**User Profile**" from the sidebar or adding **/user-profile** in the url. The user can add information like phone number, location or change name, email and password.
The `App/Http/Controllers/UserController.php` handles the user's profile information.
```
$user = User::create([
'firstname' => $request->get('firstname'),
'lastname' => $request->get('lastname'),
'password' => $request->get('password'),
'role_id' => $request->get('role'),
'email' => $request->get('email'),
'gender' => $request->get('gender'),
'location' => $request->get('location'),
'phone' => $request->get('phone'),
'language' => $request->get('language'),
'birthday' => $birthday,
'skills' => $request->get('skills')
]);
if($request->file('avatar')) {
$user->update([
'avatar' => $request->file('avatar')->store('/', 'avatars')
]);
}
}
```
### User Management
The user management can be accessed by clicking "**User Management**" from the **Laravel Examples** section from the sidebar or by adding "**/users-management** in the url. This page is available for users with the **Admin** role and the user is able to **add**, **edit** and **delete** other users. For adding a new user you can press the "**Add User**". If you would like to edit or delete an user you can click on the **Action** column. It is also possible to sort the fields or to change pagination.
On the page for adding a new user you will find a form which allows you to fill the information. All pages are generated using blade templates.
The `App/Http/Controllers/UserController.php ` takes care of data validation and creating, editing and removing a user:
```
public function destroy($id)
{
$user = User::find($id);
$user->delete();
return redirect()->route('users-management')->with('succes', 'The user was deleted');
}
```
Once the user pressed **Send** at the end of the form the new user is added to the table.
For authorizing this actions have been used policies such as `App\Policies\UserPolicy`:
```
/**
* Determine whether the authenticate user can manage other users.
*/
public function manageUsers(User $user)
{
return $user->isAdmin();
}
```
### Role Management
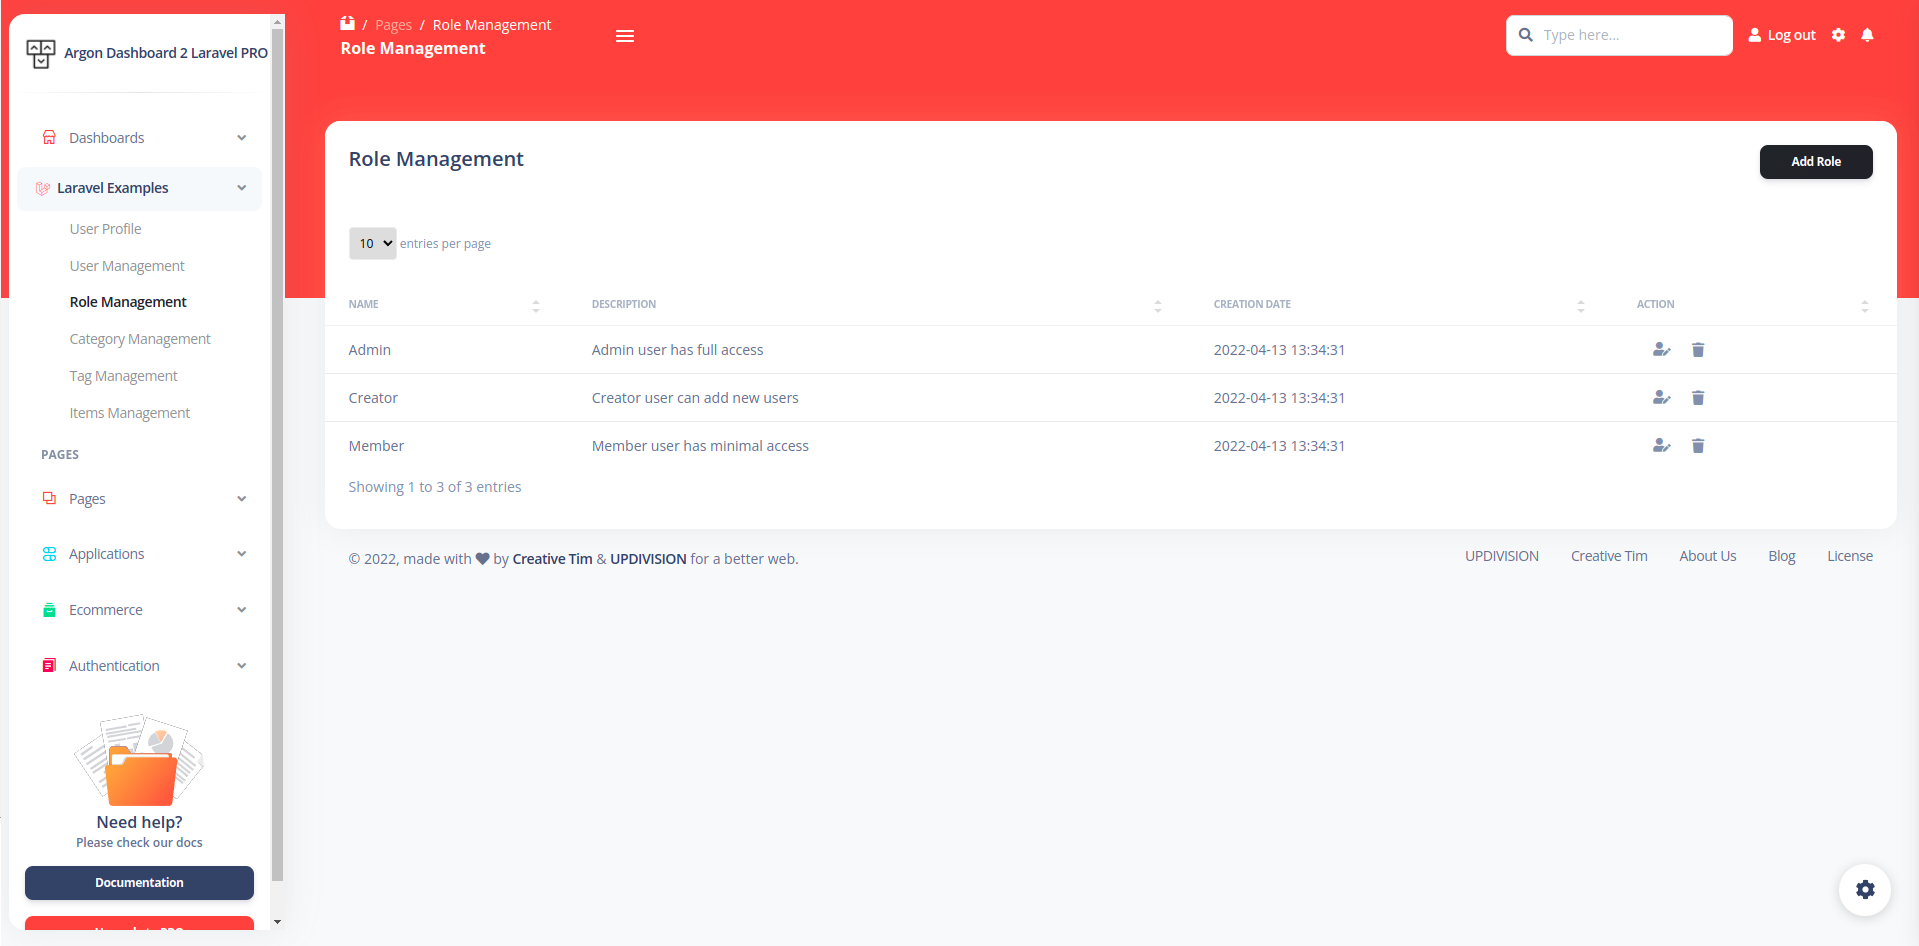
The PRO version lets you add and edit roles to the user. The default roles are **Admin**, **Creator** and **Member**. The role management can be accessed by clicking "**Role Management**" from the **Laravel Examples** section of the sidebar or by adding "**/role-management** in the url. This page is available for users with the **Admin** role and the user is able to **add**, **edit** and **delete** roles. For adding a new role you can press the "**Add Role**" button. If you would like to edit or delete a role you can click on the **Action** column. It is also possible to sort the fields or to search in the fields.
On the page for adding a new role you will find a form which allows you to fill the name and the description of the new role.
The `App/Http/Controllers/RoleController.php ` takes care of data validation and creation of a the new role:
```
public function update($id)
{
$this->authorize('manage-users', User::class);
$role = Role::find($id);
$attributes = request()->validate([
'name' => ['required', Rule::unique('roles')->ignore($role->id)],
'description' => 'required'
]);
$role->update($attributes);
return redirect()->route('role-management')->with('succes', 'role succesfully updated');
}
```
### Category Management
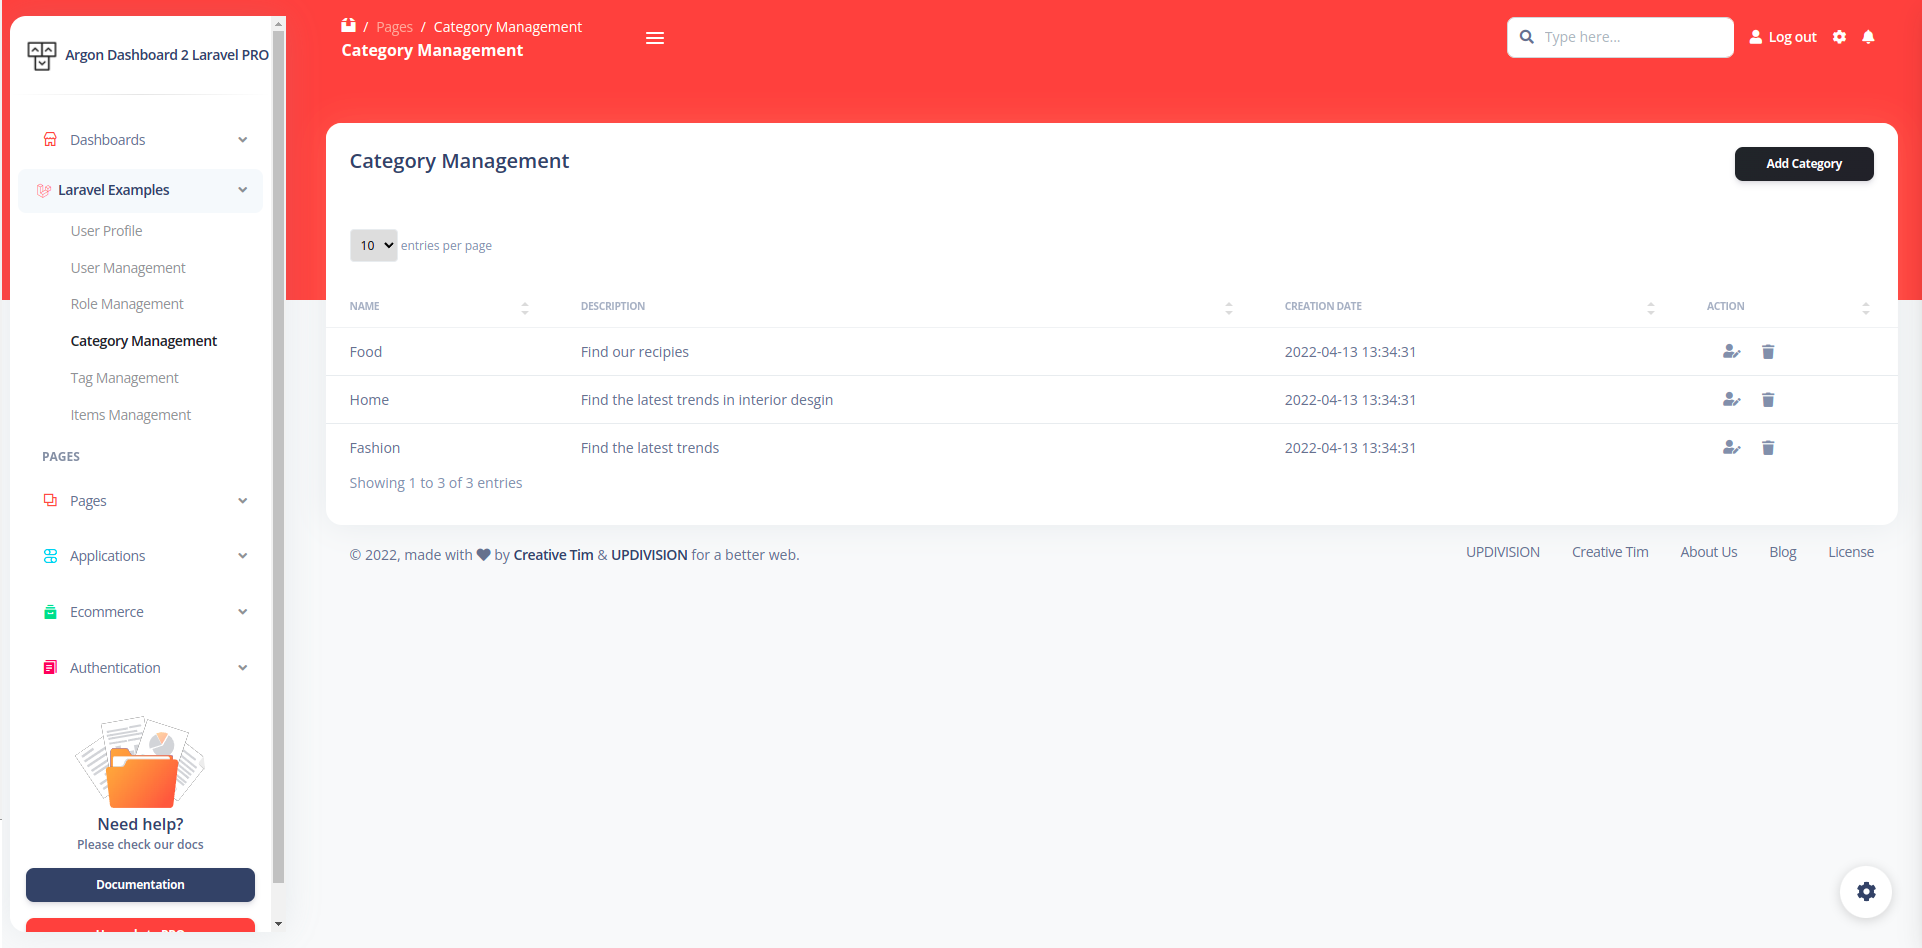
The theme has some default categories but an **Admin** or **Creator** user can manage these categories.The category management can be accessed by clicking "**Category Management**" from the **Laravel Examples** section of the sidebar or by adding "**/category-management** in the url. The authenticated user can **add**, **edit** and **delete** categories. For adding a new category you can press the "**Add Category**" button. If you would like to edit or delete a category you can click on the **Action** column. It is also possible to sort the fields or to search in the fields.
On the page for adding a new category you will find a form which allows you to fill the name and the description of the new category.
The `App/Http/Controllers/CategoryController.php ` takes care of data validation when changing a category and updating it:
```
public function update($id)
{
$this->authorize('manage-items', User::class);
$category = Category::find($id);
$attributes = request()->validate([
'name' => ['required', Rule::unique('categories')->ignore($category->id)],
'description' => 'required'
]);
$category->update($attributes);
return redirect()->route('category-management')->with('succes', 'Category succesfully updated');
}
```
### Tag Management
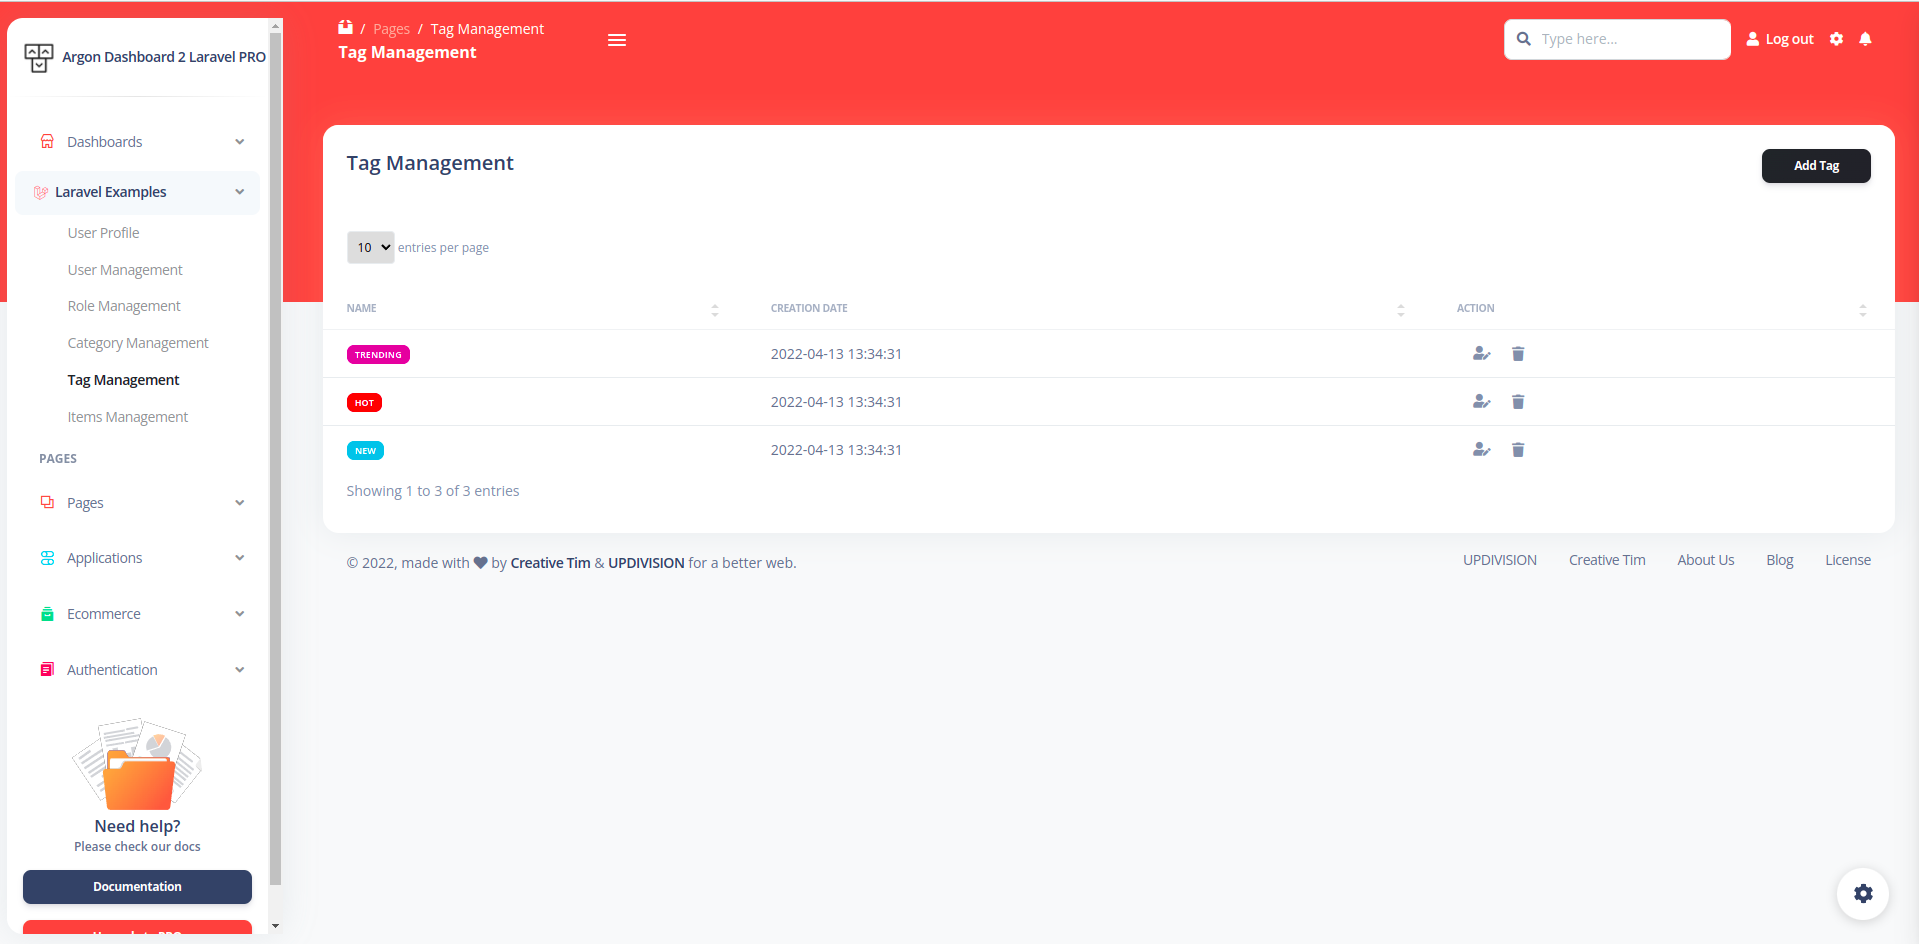
The theme has some default tags but an **Admin** or **Creator** user can manage these tags.The tag management can be accessed by clicking "**Tag Managmenet**" from the **Laravel Examples** section from the sidebar or by adding "**/tag-management** in the url. The authenticated user can **add**, **edit** and **delete** tags. For adding a new tag you can press the "**Add Tag**" button. If you would like to edit or delete a tag you can click on the **Action** column. It is also possible to sort the fields or to search in the fields.
On the page for adding a new category you will find a form which allows you to fill the name and the description of the new tag and on the edit page you will find a similar form for the changes you wish to make.
The `/resources/views/laravel/tag/edit.blade.php` is the blade template for editing a tag:
```
](https://argon-dashboard-pro-laravel.creative-tim.com/tag-management)
[View More](https://www.creative-tim.com/live/argon-dashboard-pro-laravel)
## Documentation
The documentation for the Material Dashboard Laravel is hosted at our [website](https://www.creative-tim.com/live/argon-dashboard-pro-laravel/docs/bootstrap/overview/argon-dashboard/index.html).
### Login
If you are not logged in you can only access this page or the Sign Up page. The default url takes you to the login page where you use the default credentials **admin@argon.com** with the password **secret** but you can change them with the credentials for creator and for member. Logging in is possible only with already existing credentials. For this to work you should have run the migrations. The user also has the option to choose if he wants to be remembered or not.
The `App/Http/Controllers/App/LoginController.php` handles the logging in of an existing user.
```
public function login(Request $request)
{
$credentials = $request->validate([
'email' => ['required', 'email'],
'password' => ['required'],
]);
if (Auth::attempt(['email' => $request->email, 'password' => $request->password])) {
$request->session()->regenerate();
return redirect()->intended('/');
}
return back()->withErrors([
'email' => 'The provided credentials do not match our records.',
]);
}
```
### Register
You can register as a user by filling in the name, email, role and password for your account. For your role you can choose between the Admin, Creator and Member. It is important to know that an admin user has access to all the pages and actions, can delete, add and edit another users, other roles, items, tags or categories; a creator user has acces to category, tag and item management, but can not add, edit or delete other users; a member user has access to the item management but can not take any actions. You can do this by accessing the sign up page from the "**Sign Up**" button in the top navbar or by clicking the "**Sign Up**" button from the bottom of the log in form. Another simple way is adding **/register** in the url.
The `App/Http/Controllers/Auth/RegisterController.php` handles the registration of a new user.
```
$user = User::create([
'firstname' => $attributes['firstname'],
'email' => $attributes['email'],
'role_id' => $attributes['role'],
'password' => $attributes['password']
]);
auth()->login($user);
```
### Forgot Password
If a user forgets the account's password it is possible to reset the password. For this the user should click on the "**here**" under the login form.
The `App/Http/Controllers/Auth/ResetPassword.php` takes care of sending an email to the user where he can reset the password afterwards.
```
public function send(Request $request)
{
$email = $request->validate([
'email' => ['required']
]);
$user = User::where('email', $email)->first();
if ($user) {
$this->notify(new RecoverPassword($user->id));
return back()->with('succes', 'An email was send to your email address');
}
}
```
### Reset Password
The user who forgot the password gets an email on the account's email address. The user can access the reset password page by clicking the button found in the email. The link for resetting the password is available for 12 hours. The user must add the new password and confirm the password for his password to be updated. The user is redirected to the login page.
The `App/Http/Controllers/Auth/ChangePassword.php` helps the user reset the password.
```
if ($existingUser) {
$existingUser->update([
'password' => $attributes['password']
]);
return redirect('login');
} else {
return back()->with('error', 'Your email does not match the email who requested the password change');
}
```
### User Profile
The profile can be accessed by a logged in user by clicking "**User Profile**" from the sidebar or adding **/user-profile** in the url. The user can add information like phone number, location or change name, email and password.
The `App/Http/Controllers/UserController.php` handles the user's profile information.
```
$user = User::create([
'firstname' => $request->get('firstname'),
'lastname' => $request->get('lastname'),
'password' => $request->get('password'),
'role_id' => $request->get('role'),
'email' => $request->get('email'),
'gender' => $request->get('gender'),
'location' => $request->get('location'),
'phone' => $request->get('phone'),
'language' => $request->get('language'),
'birthday' => $birthday,
'skills' => $request->get('skills')
]);
if($request->file('avatar')) {
$user->update([
'avatar' => $request->file('avatar')->store('/', 'avatars')
]);
}
}
```
### User Management
The user management can be accessed by clicking "**User Management**" from the **Laravel Examples** section from the sidebar or by adding "**/users-management** in the url. This page is available for users with the **Admin** role and the user is able to **add**, **edit** and **delete** other users. For adding a new user you can press the "**Add User**". If you would like to edit or delete an user you can click on the **Action** column. It is also possible to sort the fields or to change pagination.
On the page for adding a new user you will find a form which allows you to fill the information. All pages are generated using blade templates.
The `App/Http/Controllers/UserController.php ` takes care of data validation and creating, editing and removing a user:
```
public function destroy($id)
{
$user = User::find($id);
$user->delete();
return redirect()->route('users-management')->with('succes', 'The user was deleted');
}
```
Once the user pressed **Send** at the end of the form the new user is added to the table.
For authorizing this actions have been used policies such as `App\Policies\UserPolicy`:
```
/**
* Determine whether the authenticate user can manage other users.
*/
public function manageUsers(User $user)
{
return $user->isAdmin();
}
```
### Role Management
The PRO version lets you add and edit roles to the user. The default roles are **Admin**, **Creator** and **Member**. The role management can be accessed by clicking "**Role Management**" from the **Laravel Examples** section of the sidebar or by adding "**/role-management** in the url. This page is available for users with the **Admin** role and the user is able to **add**, **edit** and **delete** roles. For adding a new role you can press the "**Add Role**" button. If you would like to edit or delete a role you can click on the **Action** column. It is also possible to sort the fields or to search in the fields.
On the page for adding a new role you will find a form which allows you to fill the name and the description of the new role.
The `App/Http/Controllers/RoleController.php ` takes care of data validation and creation of a the new role:
```
public function update($id)
{
$this->authorize('manage-users', User::class);
$role = Role::find($id);
$attributes = request()->validate([
'name' => ['required', Rule::unique('roles')->ignore($role->id)],
'description' => 'required'
]);
$role->update($attributes);
return redirect()->route('role-management')->with('succes', 'role succesfully updated');
}
```
### Category Management
The theme has some default categories but an **Admin** or **Creator** user can manage these categories.The category management can be accessed by clicking "**Category Management**" from the **Laravel Examples** section of the sidebar or by adding "**/category-management** in the url. The authenticated user can **add**, **edit** and **delete** categories. For adding a new category you can press the "**Add Category**" button. If you would like to edit or delete a category you can click on the **Action** column. It is also possible to sort the fields or to search in the fields.
On the page for adding a new category you will find a form which allows you to fill the name and the description of the new category.
The `App/Http/Controllers/CategoryController.php ` takes care of data validation when changing a category and updating it:
```
public function update($id)
{
$this->authorize('manage-items', User::class);
$category = Category::find($id);
$attributes = request()->validate([
'name' => ['required', Rule::unique('categories')->ignore($category->id)],
'description' => 'required'
]);
$category->update($attributes);
return redirect()->route('category-management')->with('succes', 'Category succesfully updated');
}
```
### Tag Management
The theme has some default tags but an **Admin** or **Creator** user can manage these tags.The tag management can be accessed by clicking "**Tag Managmenet**" from the **Laravel Examples** section from the sidebar or by adding "**/tag-management** in the url. The authenticated user can **add**, **edit** and **delete** tags. For adding a new tag you can press the "**Add Tag**" button. If you would like to edit or delete a tag you can click on the **Action** column. It is also possible to sort the fields or to search in the fields.
On the page for adding a new category you will find a form which allows you to fill the name and the description of the new tag and on the edit page you will find a similar form for the changes you wish to make.
The `/resources/views/laravel/tag/edit.blade.php` is the blade template for editing a tag:
```
{{ $message }}
@enderror


 ## Reporting Issues
We use GitHub Issues as the official bug tracker for the Soft UI Dashboard. Here are some advices for our users that want to report an issue:
1. Make sure that you are using the latest version of the Material Dashboard. Check the CHANGELOG from your dashboard on our [website](https://www.creative-tim.com/product/material-dashboard-pro-laravel).
2. Providing us reproducible steps for the issue will shorten the time it takes for it to be fixed.
3. Some issues may be browser specific, so specifying in what browser you encountered the issue might help.
## Licensing
- Copyright 2022 [Creative Tim](https://www.creative-tim.com?ref=readme-md2pl)
- Creative Tim [license](https://www.creative-tim.com/license?ref=readme-md2pl)
## Useful Links
- [Tutorials](https://www.youtube.com/channel/UCVyTG4sCw-rOvB9oHkzZD1w)
- [Affiliate Program](https://www.creative-tim.com/affiliates/new) (earn money)
- [Blog Creative Tim](http://blog.creative-tim.com/)
- [Free Products](https://www.creative-tim.com/bootstrap-themes/free) from Creative Tim
- [Premium Products](https://www.creative-tim.com/bootstrap-themes/premium?ref=md2pl-readme) from Creative Tim
- [React Products](https://www.creative-tim.com/bootstrap-themes/react-themes?ref=md2pl-readme) from Creative Tim
- [VueJS Products](https://www.creative-tim.com/bootstrap-themes/vuejs-themes?ref=md2pl-readme) from Creative Tim
- [More products](https://www.creative-tim.com/bootstrap-themes?ref=md2pl-readme) from Creative Tim
- Check our Bundles [here](https://www.creative-tim.com/bundles??ref=md2pl-readme)
### Social Media
### Creative Tim
Twitter:
## Reporting Issues
We use GitHub Issues as the official bug tracker for the Soft UI Dashboard. Here are some advices for our users that want to report an issue:
1. Make sure that you are using the latest version of the Material Dashboard. Check the CHANGELOG from your dashboard on our [website](https://www.creative-tim.com/product/material-dashboard-pro-laravel).
2. Providing us reproducible steps for the issue will shorten the time it takes for it to be fixed.
3. Some issues may be browser specific, so specifying in what browser you encountered the issue might help.
## Licensing
- Copyright 2022 [Creative Tim](https://www.creative-tim.com?ref=readme-md2pl)
- Creative Tim [license](https://www.creative-tim.com/license?ref=readme-md2pl)
## Useful Links
- [Tutorials](https://www.youtube.com/channel/UCVyTG4sCw-rOvB9oHkzZD1w)
- [Affiliate Program](https://www.creative-tim.com/affiliates/new) (earn money)
- [Blog Creative Tim](http://blog.creative-tim.com/)
- [Free Products](https://www.creative-tim.com/bootstrap-themes/free) from Creative Tim
- [Premium Products](https://www.creative-tim.com/bootstrap-themes/premium?ref=md2pl-readme) from Creative Tim
- [React Products](https://www.creative-tim.com/bootstrap-themes/react-themes?ref=md2pl-readme) from Creative Tim
- [VueJS Products](https://www.creative-tim.com/bootstrap-themes/vuejs-themes?ref=md2pl-readme) from Creative Tim
- [More products](https://www.creative-tim.com/bootstrap-themes?ref=md2pl-readme) from Creative Tim
- Check our Bundles [here](https://www.creative-tim.com/bundles??ref=md2pl-readme)
### Social Media
### Creative Tim
Twitter: